Every identity verification integration starts the same way: someone has to read the documentation. But in 2026, developers rely on AI assistants like ChatGPT, Claude, Gemini, or Cursor to speed things up. The challenge is that these tools don’t always have access to the latest API specs. Without updated information, they can generate outdated endpoints, incorrect parameters, or code that looks valid but silently breaks in production.
That’s why we built the iDenfy MCP server. It’s a small, read-only bridge that lets any MCP-compatible AI assistant pull answers directly from our up-to-date technical documentation. Once connected, the assistant reads our real docs before it writes a single line of code, so you get working endpoints, current field names, and integration examples that match the API you’re actually calling.
It’s free and it works with every major AI assistant on the market today.
What is the Model Context Protocol (MCP)?
Model Context Protocol (MCP) is an open-source standard that lets AI assistants connect to external tools and data sources on demand. It was released by Anthropic in late 2024 and has since been adopted by OpenAI, Google, Perplexity, and most other major AI companies, allowing them to connect to external resources (such as files, databases, search engines, and APIs).
You ask a question, and then:
- The assistant decides which pages are relevant
- The MCP server returns the actual, up-to-date content
This allows you to fetch relevant, up-to-date content directly from a connected source and access real-world information or perform tasks outside the chat window.
Before approaches like MCP, giving an AI assistant access to product-specific knowledge often meant manually pasting documentation or building custom retrieval pipelines. That worked for small tasks, but quickly became impractical as documentation grew and changed. MCP solves that problem by letting the assistant fetch what it needs, when it needs it.
Automate your identity verification
See how iDenfy helps 1,000+ companies verify customers in seconds with AI-powered KYC.
Explore iDenfyWhy We Built an MCP Server For iDenfy
At iDenfy, we watched AI assistants take over a big chunk of that work over the last two years. Developers stopped copying code from the docs and started asking ChatGPT or Claude to write it for them. Useful in theory. The catch, however, is that AI assistants rely on whatever data they were trained on, which is almost never accurate.
And since we serve more than 1,000 companies across fintech, crypto, iGaming, e-commerce, and other regulated industries, we know that documentation is extremely important. For a platform like ours, where field names matter, where webhook signing has to be exact, and where a single wrong move means failing the entire integration, this approach was simply unacceptable.
That first step — translating the docs into working code — is where most of the onboarding time is spent from the development side. Our CEO, Domantas Ciulde, agrees:
“Developers don’t want to read 50 pages of documentation to find out the name of one field. We created the MCP server to turn the documentation into something the assistant can query directly, in real-time, every time.”
The result is what we wanted from day one: a developer experience where the first integration takes minutes instead of days.
How Does the iDenfy MCP Server Work?
The iDenfy MCP server gives your AI assistant live, read-only access to our full technical documentation. Once it’s connected, the assistant can search our guides, read full reference pages, and use that content to answer your questions or write your integration code.
Under the hood, the MCP server exposes a small set of tools that the assistant can use automatically:
- search_idenfy_documentation – searches across guides and API references, returning page titles, paths, and short snippets
- get_page_idenfy_documentation – retrieves the full content of a specific page (for example, kyc/generate-token) when more detail is needed
In practice, the assistant typically starts by searching the documentation and then fetches the full page when additional context is required. From your side, you simply ask questions in plain language.
Works With Every Major AI Assistant
The iDenfy MCP server is hosted at a single URL (https://documentation.idenfy.com/mcp), with no local setup required. There are no binaries to install or dependencies to manage.

You can connect your AI assistant to the server to find the available tools on the list.
How Can I Connect the iDenfy MCP Server?
Setup typically takes a couple of minutes, depending on the tool. For example:
Claude Desktop
Open your claude_desktop_config.json file and add:
{

 "mcpServers": {

   "idenfy-docs": {

     "url": "https://documentation.idenfy.com/mcp"

   }

 }

}
Restart Claude Desktop. The iDenfy tools should appear in the tool list.
Claude Code
Run the following command:
claude mcp add idenfy-docs https://documentation.idenfy.com/mcp To share the setup across a team, you can add the same configuration to a .mcp.json file in your project root.
Cursor
In Cursor, go to Settings → MCP → Add new MCP server, then paste the server URL. The server becomes available across your workspaces.
ChatGPT
ChatGPT supports MCP-style connections through custom connectors on supported plans.
To add the iDenfy MCP server:
- Open Settings → Connectors
- Click “Add custom connector”
- Set:
→ Name: iDenfy Docs
→ URL: https://documentation.idenfy.com/mcp
→ Authentication: None
- Save the connector
- Enable it from the tools menu in a new chat
→ Keep in mind that on Business or Enterprise workspaces, admin approval may be required.
Google Gemini
Google Gemini can connect via developer tools like Gemini CLI or Code Assist.
Add the server to your settings file (for example, ~/.gemini/settings.json) using the same JSON configuration as Claude Desktop, then restart the tool.
Perplexity
In Perplexity AI:
- Open Settings → Connectors
- Click “Add connector”
- Choose “Custom MCP server”
- Paste the server URL and save
- Enable it in the relevant workspace or space
Other clients
Any MCP-compatible tool can connect using the same server URL. This includes editors like Zed, Windsurf, and VS Code with MCP extensions, as well as custom-built agents.
Check your tool’s documentation for exact configuration steps.
How Can I Benefit From the iDenfy MCP Server?
Once the server is connected, you just talk to your assistant in plain language. It decides when to search our docs and when to read a full page.
Here are a few of the things developers are already using it for:
🟢 Generate Working Integration Code
Ask for a complete, production-ready snippet, and the assistant will write it against the current API.
“Write a Python script that creates an identity verification session with name and date-of-birth matching, checks proof of address, and verifies the webhook signature.”
Because the assistant pulls the Create Verification Session and Callback Signing pages from our live docs, the code uses the right endpoint, the right fields, and the correct HMAC check.
🟢 Debug an Integration
When something isn’t working, you can ask the assistant to look up the specific behaviour.
“My webhook handler returns 403 for every iDenfy request. What are the common reasons for a signature mismatch?”
The assistant opens our troubleshooting section, and explains raw body handling, hex encoding, and the most common proxy issues — all without you ever opening a browser tab.
🟢 Answer Compliance Questions
You can ask about compliance logic directly, and the assistant will pull the right pages from our KYC/AML documentation.
“Implement an integration on my WordPress website that screens every newly registered user through the iDenfy AML tool. The screening must check for negative news, sanctions exposure, and Politically Exposed Person (PEP) status.”
You get an end-to-end answer with working code, the right product plugged in, and the exact parameters our platform expects.
🟢 Build a Full KYC Integration
One of our favourite use cases is building an entire KYC integration using a single chat. This is how it works:
- Ask for the flow. The assistant describes the three steps: create a session, send the user to the UI or SDK, and handle the webhook result.
- Create the session. The code uses the current endpoint and the right field names.
- Handle the webhook. The code follows the pattern from our callback signing page.
- Clean up the parameters. The assistant checks the parameter list and removes the ones you don’t need.
The result is a working draft based on our current documentation.
What About Privacy and Scope?
We built the iDenfy MCP server with a very narrow scope on purpose. It is read-only, and it only serves content from documentation.idenfy.com.
That means, it:
- Does not write, modify, or delete anything in your account.
- Does not make API calls on your behalf, and it does not see verification results.
- Does not have access to your iDenfy dashboard, sessions, API keys, or customer data.
Your prompts and documentation still pass through your chosen provider, so review their data policy before sharing sensitive information. But nothing sensitive ever leaves your dashboard through our MCP server, because our MCP server never sees it. Developers stay in full control of what they share with their AI assistant provider.
Other Tips For Using the iDenfy MCP Server
A few tips we’ve learned from developers already using it in production:
- Be specific in your prompts. “Create a KYC session for a Lithuanian citizen with NFC-based document reading” beats “show me KYC code.”
- Ask the assistant to cite the page it used. This makes it easy to double-check against the source.
- Use it alongside your code editor. Ask the assistant to adapt snippets to your existing project structure, not the other way around.
- Search before you read full pages. The assistant is faster when it narrows the scope first.
- Never share API keys or customer data with the assistant. The MCP server doesn’t need them, and neither does your prompt.
- Always review the generated code. AI assistants are fast, but you are still responsible for what ships to production.
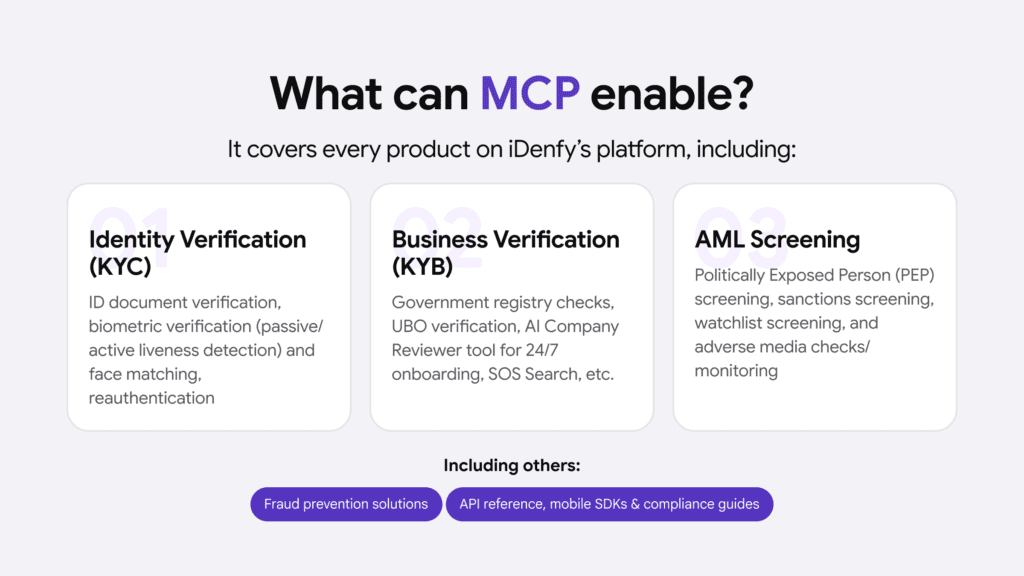
Whether you’re building a KYC flow for a new fintech, adding KYB to an onboarding pipeline, or plugging our AML Screening and Monitoring solution into a WordPress site, your AI assistant now answers from the real, up-to-date docs.
Get Started With iDenfy
Find full setup instructions for each client live by clicking here.
The iDenfy MCP server is available right now, it’s free for all developers, and it works with every major AI assistant on the market.
And if you want to see how the full platform fits together (identity verification, business verification, AML screening, or other fraud prevention tools), let’s talk, and we’ll give you a quick dashboard tour.