Manual Know Your Customer (KYC) onboarding is still an option for extremely small teams handling very few new applications daily. And by manual, I mean reviewing government-issued ID photos, looking up internal blocklist databases, going on Google, then Companies House or any other registry and typing the information, searching up a certain sanctions list, etc. Monitoring or re-verification is a whole other deal, which also makes it difficult to track user risk profile changes manually.
In high-risk or strictly regulated industries, where the standard KYC process isn’t just a simple ID check and a few emails to the client, manual processes will probably cause you a headache after the first new client onboarding case review. Thankfully, a KYC API, or a small piece of software, will instantly remove the hassle that I just described. Of course, if you carefully choose the right solution.
A good identity verification API has one goal. For the business, it needs to help ensure compliance and save costs that would otherwise be spent on a larger analyst team. For the user, it needs to provide a smooth U/X, leaving them with a pleasant impression about their IDV session. For the developer, the integration should be quick and simple, or else there are a bunch of other implementation options out there.
Tag along, as I’ll explain what automation capabilities a typical KYC API should have and which API solutions are worth your time and funds.
What is a KYC API?
A KYC API (Application Programming Interface) is a ready-made identity verification solution that automates user onboarding. Instead of building and developing software in-house that costs you time and puts your developer team at work, perhaps in a field that’s not directly linked to your business operations, an ID verification API solves these issues. You integrate a single solution and don’t need to worry about manually collecting client IDs and reviewing the credentials to assess if they’re legitimate. An API runs automatically and helps you scale.
The base for a modern KYC API solution is to offer automated government ID checks and biometric verification at a minimum. That means the user is prompted to capture their passport/ID/driver’s license or residence permit + show their face and capture their biometrics, sometimes performing a slight movement for liveness detection. The KYC API role here is to extract personal information and check if it’s correct, not forged, and that it matches. The selfie step is required to compare the person’s live facial features with their ID photo to see if they’re the same person.
Automate your KYC process
iDenfy verifies customers from 200+ countries in seconds. AI-powered, compliant, and trusted by 1,000+ companies.
Explore KYC SolutionWhat Does a KYC API Do?
A KYC API is programmed to return information on a client, automatically determining if it’s correct and matches another source; for example, whether it’s a KYC process with a doc ID check and a selfie check, or database cross-matching, using pre-recorded or extracted information and cross-matching it with a government database or global watchlist. This is designed on purpose as a way to serve the general goal of KYC verification, which is to verify the user’s identity and determine if it’s real and appropriate for your platform.
KYC APIs automate multiple mandatory onboarding processes. The ones that fall under the “KYC” umbrella often are:
- ID document verification, answering the “is it genuine” question
- Biometric verification, answering the “does the person’s face match their ID” question
- Liveness detection, answering the “is this the same person and are they completing the check in real-time” question
- Address verification, answering the “is this address legit and does it match the person’s profile” question
- Age estimation/verification, specifically answering the “is this person old enough” question, relevant for age-restricted platforms or social media (depending on the jurisdiction)
- AML screening, answering the “is this person listed on any PEPs and sanctions lists, global watchlists, or adverse media” question
For example, a sanctioned individual/entity can’t access financial services in certain countries due to AML laws and their status. The same principle applies to a blocklisted gambler if they try to re-register on an iGaming app and the KYC API returns results indicating that there’s a match in the blocked player list. There are extra KYC APIs, such as tools for a criminal background check, which are beneficial for HR and hiring services or other high-risk industries where employees need to have a clean track record.
What Benefits Will I Get With a KYC API?
It depends on the specific API you choose, but the one rule is that instead of multiple KYC APIs, you should look for one that automates the processes that you need to automate your user onboarding and compliance processes. Otherwise, it starts getting complex when you need to maintain multiple integrations, and the compliance team needs to switch from one dashboard to another.
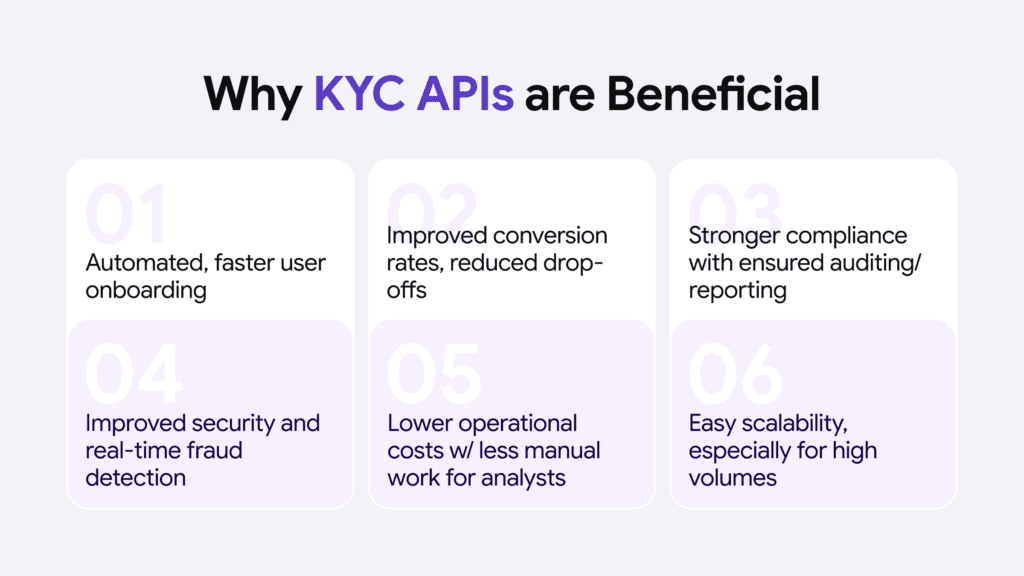
There are exceptions to this, but for a standard KYC onboarding workflow, an end-to-end KYC API solution like iDenfy covers everything (doc-based government-ID verification, selfie with liveness checks, database cross-matching, non-doc workflows, such as age estimation or pre-recorded credential/eID verification, and so on).
These are the benefits that most KYC APIs enable companies to access and actually make a bigger positive impact:
1. You Save Time for Compliance Officers
Without an identity verification API, compliance teams can’t onboard a large volume of new customers and check their IDs manually unless the team is relatively big and the number of new clients is below average. There are also industries where users have extremely high hopes for a fast KYC journey. For example, iGaming or fintech. A player wants to access their games and is often excited to start playing. Another user chooses a fintech platform often because it has better rates and a better user experience, which should be fast and fully digitally smooth.
Analysts are part of it and can’t make the decision if they don’t have the collected KYC documents from the client. If the company hasn’t integrated an API, the burden goes onto them, putting pressure not to make mistakes and, at the same time, not to create a backlog. A KYC API automates onboarding and allows low-risk users to pass the process first-time, on average, improving your KYC completion rate at least by 15%, especially if you previously used manual IDV onboarding measures.
Related: Choosing a Good Identity Verification Solution [Buyer’s Guide]
2. You Manage KYC Data More Easily
This is important to keep a compliant audit log without having to log specific files or attach collected documents. An API automates this part as well, ensuring you keep up with regulatory reporting requirements, vital in all industries, especially high-risk sectors. The universal nature of the end-to-end KYC API reduces the technical complexity. Once integrated, the ID verification sessions run in the background, and you have the time and resources to scale faster or access certain new markets.
For example, you’re a small enterprise that doesn’t have dedicated in-house developers/compliance officers but can’t keep up with the manual workload that KYC onboarding is taking up. With the KYC API, you solve this issue and also maintain the KYC records and monitoring more easily, because it’s now an automated process as well. Some IDV API vendors also allow you to white-label the workflows and deliver a native-level user experience.

For example, iDenfy’s system supports 35+ languages, including recent additions like the Spanish localization, without redirecting the user to a separate window and automatically detecting their country/document type based on their IP and other behavioral signals. You then see all of the data, the tags, why the verification failed, or if any AML hits were found.
Related: Document Verification: What’s the Right KYC Automation Workflow?
3. You Ensure That Users Get Onboarded Faster
This is the most obvious benefit, but a very important one because it directly impacts your company’s revenue. The fewer users you welcome to your platform, the fewer funds they are likely to spend within your network. For new and returning users, a smooth verification process is everything; otherwise, you risk letting them go to a competitor. A well-designed KYC API will reduce friction and help you automate the risk-based approach, so you can juggle multiple workflows, depending on the user type and the risk they pose.
For example, you should be able to customize the rules and have dynamic workflows, whether it’s an individual customer onboarding or a corporate entity. Special add-ons, like bank account verification or bank card verification, also help onboard users more swiftly and block unwanted ones. This is common in industries prone to fraud. You don’t want bonus abuse and duplicates, or those who are already banned on an app trying to return with a relative’s credit card or a whole new synthetic identity, where some details are real and some are stolen/borrowed.
Related: 5 Key Customer Onboarding Mistakes Costing Your Business Growth
How Does iDenfy’s KYC API Work?
It automates the whole user onboarding process, including handling KYC data and ensuring a compliant audit log.
This is what the end-user sees:
- They’re asked to capture their ID document (document verification)
- The system triggers the 3D liveness check to confirm if the person isn’t using any spoofing in real-time (biometric verification)
- The system uses OCR data extraction and AI to check the document and match the selfie with it (automated analysis)
- iDenfy’s in-house KYC specialists review flagged cases and double-check if the system provided the right results (this is optional)
- Results are returned, the user gets either “Approved” or “Denied”, or, alternatively, “Suspected” via webhook
For example, when you receive SUSPECTED, the system returns a status and a reason “why” via two KYC tag categories:
- mismatchTags — data disagreements, such as NAME, SURNAME, DATE_OF_BIRTH, UNDER_AGE
- fraudTags — risk signals, such as FACE_IN_BLOCKLIST or AML_SUSPECTION
So, when a user starts their IDV, they don’t send their document or selfie to your backend. Using the API, your system creates a verification session with iDenfy and then they complete the session within iDenfy’s environment.
Once the KYC is completed, iDenfy sends a notification with the results (approved, denied, or suspected):
🟢 User -> iDenfy -> verification -> iDenfy sends result -> your backend, instead of
🔴 User -> your backend -> faw ID/selfie -> your backend still needs to process and store KYC data.
How to Integrate iDenfy’s Identity Verification API
It takes three steps, as you need to:
1. Create the IDV Session
You use the API key and secret and post the user’s identifier to the token endpoint.
The response contains an authToken and a redirectUrl. Keep in mind that clientId is your identifier (not iDenfy’s), showing how the eventual webhook maps back to a user record in your database. scanRef is the identifier on our side. Also, a mismatch doesn’t fail the verification. It returns as SUSPECTED with a mismatchTags array explaining which field isn’t aligning (NAME, SURNAME, DATE_OF_BIRTH).
-> I recommend checking out our Docs directly in case you need more information.
2. Send the User to the Verification Session
This is where the options show up once again. You should choose the method based on your platform and concrete use case because it affects the end-user experience during their KYC process.
🟣 Redirect sends the user to the redirectUrl returned in step one (the simplest option):
window.location.href = data.redirectUrl; 🟣 iFrame keeps the user on your domain (embedded).
-> Sizing matters. Our dev team recommends at least 670px by 800px on desktop, and 100% width and height on mobile with no fixed pixel values. If you accidentally undersize the container, your users can end up scrolling inside the frame and missing instructions, ultimately abandoning their KYC session.
Also, keep these two things in mind:
- allowfullscreen is required if you’re using 3D liveness
- Do not pass successUrl, errorUrl, or unverifiedUrl when generating the token because these will break the embedded flow
🟣 Mobile SDK. Pass the same authToken into the Mobile SDK (Android/iOS).
3. Handle the Webhook
This is the stage that confirms if your integration is working or not.
{

  "status": { "overall": "APPROVED" },

  "data": { "docFirstName": "JOHN", "docLastName": "DOE" },

  "scanRef": "d2714c8a-...",

  "clientId": "user-123",

  "final": true

}
Read final before you read status. When final is true, the decision is settled. When it’s false, the result is preliminary and a human reviewer will need to follow up with a second webhook. For example, IDENTIFICATION_RESUBMITTED -> final is true -> we know the user submitted the requested information and the case is resolved.
For example, when your server calls the request-information endpoint, the user’s token is reactivated and they receive an email with a re-upload link (but no webhook fires at that point). The event only fires when they actually submit. If they never do, you get IDENTIFICATION_EXPIRED instead.
-> You get a custom number of overall re-verification attempts, defaulting to 1, set at token generation. Individual upload steps allow up to 3 attempts each before the step is counted as failed.
Useful Final Tips on ID Verification APIs
The typical KYC API integration takes approximately a week (or less); if not, take this as a red flag. However, end-to-end ID verification providers like iDenfy also have other options for no-code integrations, such as Zapier, Magento, Shopify, or WooCommerce. We’re also planning to launch a no-code age estimation tool, which is already in development.
Don’t forget to look for proper documentation, pre-made workflows (to speed up the process) based on industry requirements, compliant audit log capabilities, and the overall global aspect (so that you can scale to your operating markets). Also, always test the API solution out using dummy results.
Key things to take away:
- A good KYC API should automate the whole onboarding process
- Always try multiple vendors, but don’t focus only on the price: support, integration options and all that jazz matter
- The end-user experience is very important, as it shapes the way they trust your services and if they’re willing to keep using them after the initial onboarding
- Look for an ID verification API that supports your risk appetite; that means if you need multiple checks, only an ID doc check API won’t do the job for you
- Identify an IDV API solution provider that has clients in your industry/supports your unique case (crypto vs fintech onboarding differs, and the same goes for specific, more niche industries)
Get started to test out our API for free.
But if you’re still not sure what you’re looking for in a KYC API, jump into a quick demo with our Sales team.